There are many WordPress plugins for creating opt-in forms both free and premium. Those are great if you are going to be creating a lot of forms and inserting them in the middle of articles. If you only need a single form in your sidebar or at the end of your blog posts then those might be a bit overkill for you. I’m going to walk through creating a simple form in WordPress for connecting to your mailing list in Drip.
Inside Drip click on “Forms” in the top menu and then on “New Opt-In Form”.

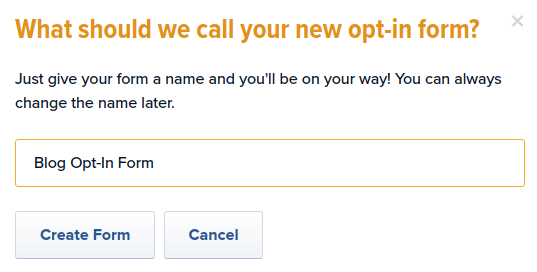
Type in the name of your form and click on “Create Form”.
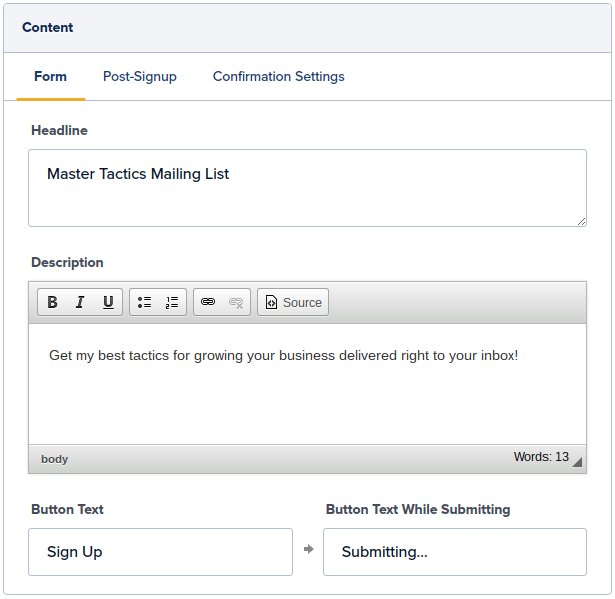
Enter a headline and a description for you list.
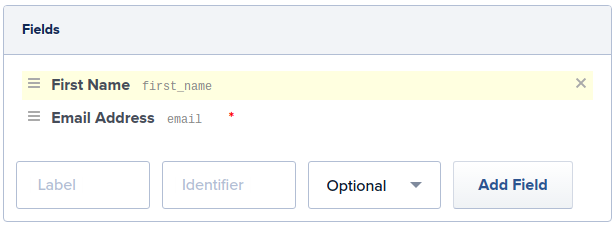
We want to have the new subscriber’s first name so that we can use Drip’s shortcodes to automatically address each email to the subscriber ( {{ subscriber.first_name }}. We are going to do this by adding the field and making it required.

Customarily people put the name field above the email address field on their forms so we are going to rearranging the fields by clicking on the three bars icon to the left of the fields and, by holding down the mouse button, dragging the first name field above the email address field.
Click on the “Enable the widget” checkbox so that it is unchecked. We are not going to use this as a popup form.
This will switch you over to the embedded form code that we are going to use later.
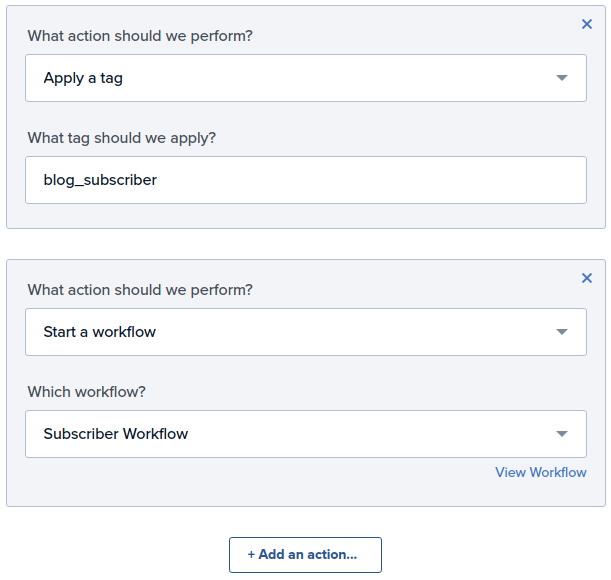
Now click on the “Rules” tab at the top followed by “Add an action…”
We are going to select “Apply a tag” and enter a tag of “blog_subscriber”.
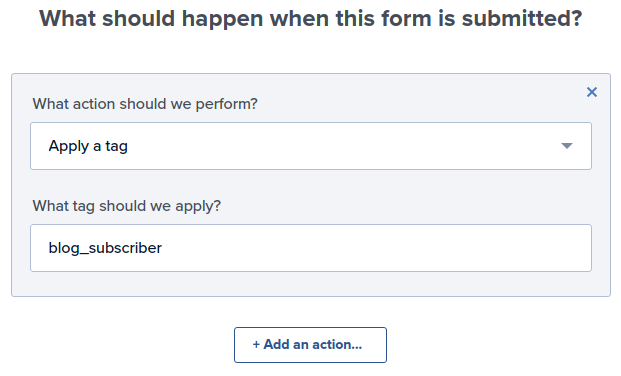
You can click “Add an action…” again and then use Drip’s powerful automation features to lead them through a new subscriber workflow that you have set up:
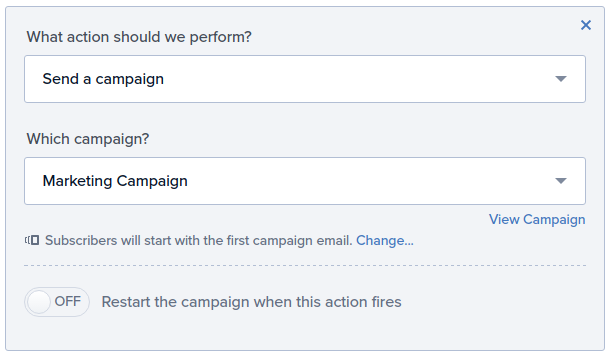
Or you can subscribe them to a new subscriber drip email campaign that you have created:
Click on “Save Changes” and then scroll up and click on “Activate Now”.
Now log into your WordPress administration dashboard. Click on “Appearance” on the left menu followed by “Widgets”. Select the “Text” widget.
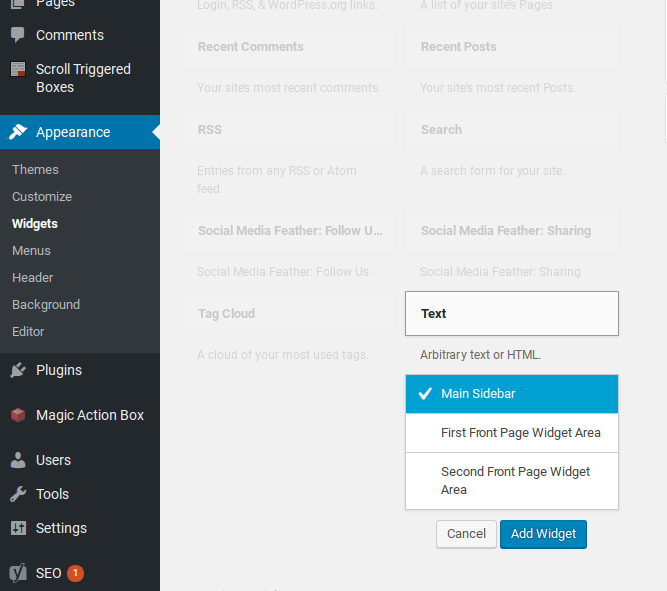
The first opt-in form we are going to create is your Main Sidebar form. Select that and click on “Add Widget”. Leave the “Title” section blank and copy the following inside of the “Content” section:
<style type="text/css">
#sidebar_optin_form {
    background-color: #000000;
    padding: 10px;
    color: #ffffff;
    text-align: center;
}

#sidebar_optin_form h3 {
    color: #ffffff;
    font-size: 22px;
    text-align: center;
    margin-bottom: 10px;
}

#sidebar_optin_form label {
display: none;
}

#sidebar_optin_form br {
display: none;
}

#sidebar_optin_form input {
    margin-top: 10px;
    width: 100%;
    box-sizing: border-box;
}
#sidebar_optin_form input[type="submit"] {
    font-size: 18px;
    background-color: #0274BE;
    border: none;
    border-radius: 3px;
    padding: 12px 24px;
    color: #FFF;
    width: 100%;
    background-image: none;
}

<div id="sidebar_optin_form">

</div>
Now go back into Drip and under the “Design” tab of your form select the code under “Embedded” and copy that into your form between the div tags in the above code that you pasted into WordPress.
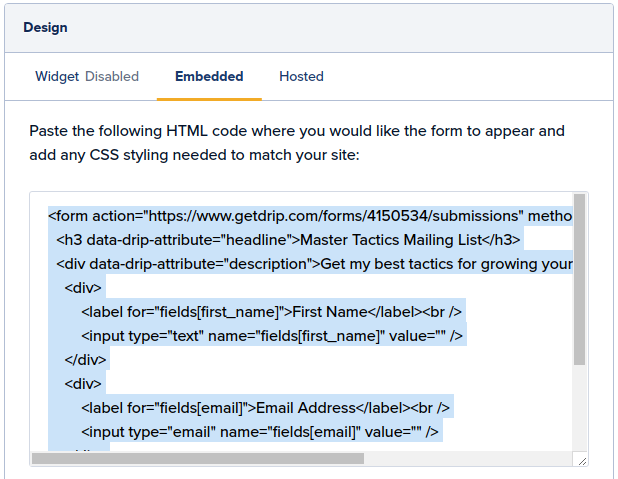
Finally, change the following lines:
<input type="text" name="fields[first_name]" value="" />
To
<input type="text" name="fields[first_name]" value="" placeholder="First Name" />
And
<input type="email" name="fields[email]" value="" />
To:
<input type="email" name="fields[email]" value="" placeholder="Email Address" />
It should look like this when you are done:
<style type="text/css">
#sidebar_optin_form {
    background-color: #000000;
    padding: 10px;
    color: #ffffff;
    text-align: center;
}

#sidebar_optin_form h3 {
    color: #ffffff;
    font-size: 22px;
    text-align: center;
    margin-bottom: 10px;
}

#sidebar_optin_form label {
display: none;
}

#sidebar_optin_form br {
display: none;
}

#sidebar_optin_form input {
    margin-top: 10px;
    width: 100%;
    box-sizing: border-box;
}
#sidebar_optin_form input[type="submit"] {
    font-size: 18px;
    background-color: #0274BE;
    border: none;
    border-radius: 3px;
    padding: 12px 24px;
    color: #FFF;
    width: 100%;
    background-image: none;
}

</style>

<div id="sidebar_optin_form">

<form action="https://www.getdrip.com/forms/4150534/submissions" method="post" data-drip-embedded-form="4150534">

<h3 data-drip-attribute="headline">Master Tactics Mailing List</h3>

<div data-drip-attribute="description">Get my best tactics for growing your business delivered right to your inbox</div>

<div>
<label for="fields[first_name]">First Name</label>
<input type="text" name="fields[first_name]" value="" placeholder="First Name" />
</div>

<div>
<label for="fields[email]>Email Address</label>
<input type="email" name="fields[email]" value="" placeholder="Email Address" />
</div>

<div>
<input type="submit" name="submit" value="Sign Up" data-drip-attribute="sign-up-button" />
</div>

</form>

</div>
Click “Save” and then “Close”
Your new drip email opt-in form should be in your sidebar and look like this:

As a bonus we are going to create a second style of form that you can use on your homepage (or you can use in your blog posts by using a plugin such as Widgets on Pages which, coupled with these forms, is a free alternative to the excellent Gravity Forms plugin).
For this form we want to have a small graphic that highlights what you are promising with the form. If you are using a lead magnet such as an ebook then you might have a physical book mocked up with your title. For “growing your business” an icon that shows a revenue graph going “up and to the right” would work.
I like to use Iconfinder and this icon by First Styles is a good one for business growth.

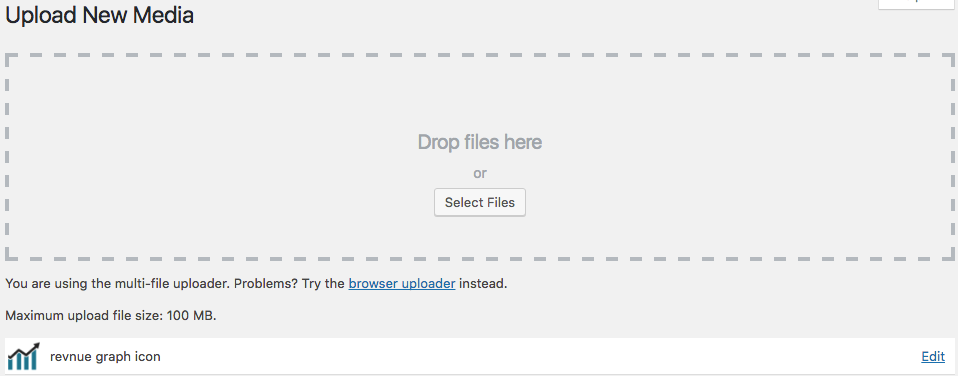
I am using the 256×256 version when I have downloaded and then uploaded it into WordPress. Once it is uploaded it will be listed. Click on “edit”.
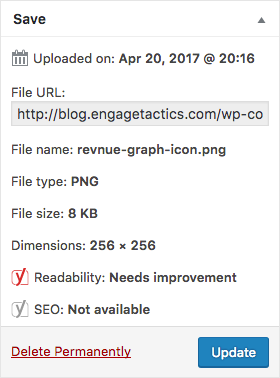
On the right side of the screen is the file URL which we will need later. Copy that.
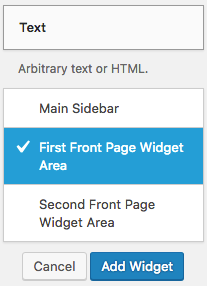
Now click on “Appearance” followed by “Widgets”. Select the “Text’ widget follow by “Front Page Area”. (You can move them to “Inactive Widgets” if you use the above mentioned plugin, or one like it, to add the widgets to your post.)
Leave the “Title” section blank and then paste the following into the “Content” section.
<style type="text/css">
#main_optin_form {
    width: 600px;
    border: 1px solid #d3d3d3;
    display: table;
    padding: 10px;
    font-size: 14px;
}
.optin-form-left {
    width: 50%;
    float: left;
}
.optin-form-right {
    width: 50%;
    float: right;
    text-align: center;
}
#main_optin_form h3 {
    font-size: 22px;
    margin-bottom: 10px;
}
#main_optin_form label {
    display: none;
}
#main_optin_form br {
    display: none;
}
img.main-optin-form-image {
    display: block;
    margin: auto !important;
    float: none !important;
    border-radius: 0px;
    box-shadow: none;
}
#main_optin_form input {
    margin-top: 10px;
    width: 100%;
    box-sizing: border-box;
    padding: 12px;
    font-size: 14px;
}
#main_optin_form input[type="submit"] {
    font-size: 18px;
    background-color: #0274BE;
    border: none;
    border-radius: 3px;
    padding: 12px 24px;
    color: #fff;
    width: 100%;
    background-image: none;
}
</style>

<div id="main_optin_form">

<div class="optin-form-left">
<img src="" class="main-optin-form-image">
</div>

<div class="optin-form-right">

</div>

</div>
Now paste the URL of your image inside of the “img” tag–specifically inside quotes here: src=””.
Paste the embedded form code from Drip inside the “optin-form-right” div.
And, like with the last form, make these two changes:
<input type="text" name="fields[first_name]" value="" />
To
<input type="text" name="fields[first_name]" value="" placeholder="First Name" />
And
<input type="email" name="fields[email]" value="" />
To:
<input type="email" name="fields[email]" value="" placeholder="Email Address" />
The final code should look like this:
<style type="text/css">

#main_optin_form {
    width: 600px;
    border: 1px solid #d3d3d3;
    display: table;
    padding: 10px;
    font-size: 14px;
}
.optin-form-left {
    width: 50%;
    float: left;
}
.optin-form-right {
    width: 50%;
    float: right;
    text-align: center;
}
#main_optin_form h3 {
    font-size: 22px;
    margin-bottom: 10px;
}
#main_optin_form label {
    display: none;
}
#main_optin_form br {
    display: none;
}
img.main-optin-form-image {
    display: block;
    margin: auto !important;
    float: none !important;
    border-radius: 0px;
    box-shadow: none;
}
#main_optin_form input {
    margin-top: 10px;
    width: 100%;
    box-sizing: border-box;
    padding: 12px;
    font-size: 14px;
}

#main_optin_form input[type="submit"] {
    font-size: 18px;
    background-color: #0274BE;
    border: none;
    border-radius: 3px;
    padding: 12px 24px;
    color: #FFF;
    width: 100%;
    background-image: none;
}

</style>

<div id="main_optin_form">

<div class="optin-form-left">
<img src="https://www.startuplevelup.com/wp-content/uploads/sites/9/2017/04/revnue-graph-icon.png" class="main-optin-form-image">
</div>

<div class="optin-form-right">

<form action="https://www.getdrip.com/forms/4150534/submissions" method="post" data-drip-embedded-form="4150534">

<h3 data-drip-attribute="headline">Master Tactics Mailing List</h3>

<div data-drip-attribute="description">Get my best tactics for growing your business delivered right to your inbox!</div>

<div>
<label for="fields[first_name]">First Name</label>
<input type="text" name="fields[first_name]" value="" placeholder="First Name" />
</div>

<div>
<label for="fields[email]">Email Address</label>
<input type="email" name="fields[email]" value="" placeholder="Email Address" />
</div>

<div>
<input type="submit" name="submit" value="Sign Up" data-drip-attribute="sign-up-button" />
</div>
</form>

</div>

</div>
And your new form will look like this:

I know it took me a decent amount of time to create my first forms in WordPress so hopefully these will help save you some time as well as increase your subscriber count!
p.s. this next form is real and you can put your name and email address in it. 🙂

